I’ve spent the last couple months configuring and setting up a new home server, with the intent of using it as a storage and media server.
I looked at a few different options for the operating system I wanted to run. I knew I wanted to use an OS with support for an advanced filesystem with features like snapshots and check-summing for data integrity. It’s going to be used as a storage server so I wanted a filesystem that wasn’t going to corrupt my data. I also knew I was going to be working with at least four discs to start, maybe more, so I wanted a filesystem that was able to deal with multiple drives and a large storage pool. This really didn’t leave me with too many choices and thus I settled on using a variant of FreeBSD with ZFS. I considered using a Linux distribution with ZFS as that’s what I’m more comfortable with, but largely due to the amount of user adoption on FreeBSD the amount that ZFS has been tested on Linux comes nowhere close to how much it’s been tested on FreeBSD. In addition to that, at the time of this build no Linux distribution ships with ZFS support natively, hopefully this changes soon.
I considered using plain FreeBSD to give myself complete flexibility, but given that this was my first server build and I was basically intending to use the server for network attached storage, I settled on using FreeNAS for the ease of use and advanced features. FreeNAS is a variant of FreeBSD that has been altered in order to be an easy to use network attached storage server. The way FreeNAS is designed also makes it very easy to backup the server configuration. Instead of saving all the raw data from how the server is set up, the settings are saved into a database which can easily be backed up and restored. This makes it very easy to get back up and running after a reinstall. FreeNAS can all be managed from a web interface and is easy to use but is also filled with power features. Since it’s also essentially FreeBSD under the hood, if you do want to accomplish something that can’t be done in the web interface, you can easily drop down into the command line. The web interface makes it easy to manage your ZFS volumes and discs, letting you attach new pools or export your pools, take snapshots, make datasets, and use ZFS replication. I figured this would be an easy way to get used to using all these features and that if I wanted to switch to FreeBSD at a later date it would be as easy as exporting my pool and installing FreeBSD.
Hardware Requirements Link to heading
On the FreeNAS website the minimum hardware requirements are listed as:
- Multicore 64-bit processor (Recommended Intel)
- 8GB boot drive
- 8GB of RAM
- A physical network port
And the recommended hardware is listed as:
- Multicore 64-bit processor (Recommended Intel)
- 16GB boot drive
- 16GB of ECC RAM
- Two directly attached discs (non-hardware RAID)
- A physical network port
One thing that might stick out here is that hardware RAID is not recommended. This is because ZFS uses software RAID, and thus if you use a hardware RAID controller there is an extra layer in between ZFS and the discs. This can hide things from ZFS and cause problems, so a host bus adapter (HBA) is recommended for use instead of a RAID controller.
The other thing is Error Correcting memory (ECC). There has been a lot of talk about whether or not it’s necessary to use ECC RAM, but ultimately the consensus is if you care about data integrity on your server, you should have it. This is especially true on a server intended for storage. ECC RAM is able to detect and correct data corruption in memory. This is necessary even with ZFS having advanced error checking capabilities.While ZFS is able to check to make sure your data remains in the same state in which it was written, it has no way of verifying the quality of that data. When incorrect data (say in the form of a flipped bit) gets read from memory, ZFS has no way of knowing that the data is corrupted and will still write it to the disk. ECC RAM, on the other hand, will correct the most common types of data corruption.
What made the hardware in my build atypical from the average server build is the requirements of ZFS. In order to work correctly ZFS requires a lot of memory, as it uses an intelligent caching system called the “adaptive replacement cache” that allows it to make good use of whatever memory you give it. If you do not have enough memory all sorts of strange things can start happening on your system. It is therefore not recommended to run FreeNAS with any less than 8 GB of memory, and for every terabyte of storage on your server, an additional gigabyte of memory should be added. t makes sense to start with a minimum of around 16GB of memory on most home sized server builds.
Build Link to heading

The parts I ended up deciding on for my build were probably a bit overkill for my needs, but I wanted to build something that I knew would last for a while and would work for anything I wanted to throw at it. My requirements were something that would be small enough to sit by my desk, was quiet, and drew fairly little power. I also wanted it to be expandable and have fault-tolerance so that I could lose several drives and not lose my data. These requirements were what ended up bringing me to my choice of hardware.
Parts Link to heading
- Fractal Design Node 804 Chassis
- Supermicro X10SL7-F Motherboard
- Xeon E3-1231 v3 CPU
- 4x Samsung DDR3 1.35v-1600 M391B1G73QH0 RAM
- 2x 32GB SATA III SMC DOM Boot Drive
- SeaSonic G-550 Power Supply
- Cyberpower CP1500PFCLCD 1500VA 900W PFC UPS
- 6x Western Digital 6TB Red HDD
- 2 x ENERMAX T.B. Silence UCTB12P Case Fan
- 3x Noctua NF-P14s redux-1200 Case Fan
Supermicro X10SL7-F Motherboard Link to heading

Initially when I started the build I was looking at mini-ITX motherboards. With a mini-ITX you can get a smaller case as well as possibly lower power consumption. In particular I was impressed with the feature set on the ASRock 2550D4I. However, the small cases that a mini-ITX permits can actually be a be an issue. When you cram all of your hard drives in an extremely small space where you have impeded air flow, you’re more likely to start having heat problems.It probably wasn’t the best idea to get a tiny case, cram a bunch of hard drives together and expect a quiet and cool box. In addition, the kind of power you’re going to get out of the Atom processor that is on the ASRock is not even close to what you would get out of a Xeon.
Upon doing a bit more reading and listening to people’s recommendations on the FreeNAS forums, I came to the conclusion that I’d be better off getting a Supermicro micro ATX motherboard. They are the most highly recommended and compatibility issues are less likely. They’re also server grade motherboards, which means they have features you’re not going to see in a desktop motherboard. During the build, the one feature that ended up being my favorite was IPMI. It allows you to administer the motherboard remotely, meaning you never have to hook up a monitor and keyboard to turn on and off the server, type commands into the console, and view sensor information.
There are a few options that I looked at from Supermicro, in particular the X10SLL-F, X9SRH-7F and X10SL7-F. The X10SLL-F had a max of 6 discs, and I wasn’t sure if that was going to be enough in case I wanted to expand in the future. The X9SRH-7F, on the other hand, is double the cost of the X10SL7-F and is a bit overkill for my needs. The X10SL7-F seemed like a good middle ground, as it’s half the price of the X9SRH-7F. Seeing as I didn’t think I would need any more than 32 gigabytes of RAM, and it includes a LSI SAS 6Gbps controller, it seemed like the best choice.
Chassis Link to heading
Fractal Design Node 804 Link to heading
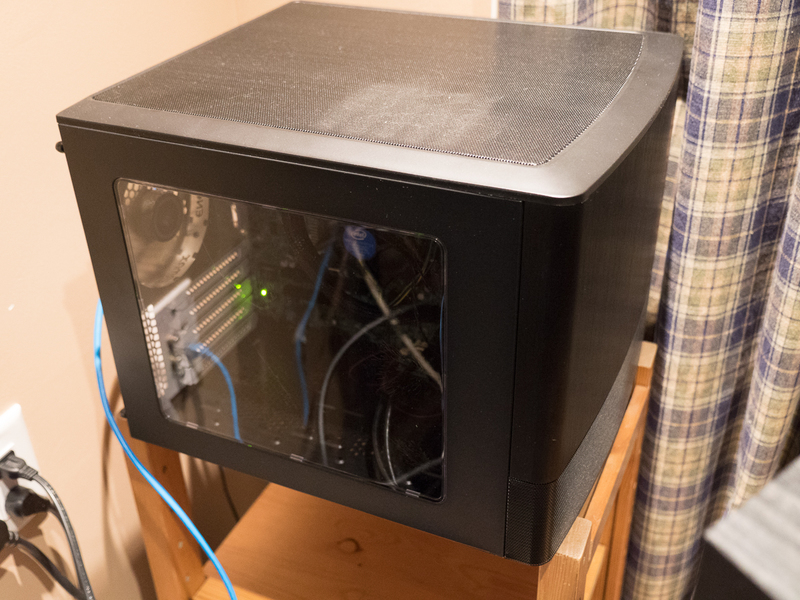
I ended up choosing this chassis as I wanted something a little bit different for my server than just a regular tower case to differentiate it from a desktop. Fractal Node makes really nicely designed cases, and this one in particular has lots of room for airflow on the inside as well as room for up to 10 3.5" drives and two 2.5" drives. I probably could have gotten away with a smaller case if I had gone with the tower, as there is a fair bit of room on the one side where the hard drives aren’t stored since I didn’t need a graphics card.
CPU Link to heading
Xeon E3-1231 v3 Link to heading
Seeing as I wanted a CPU that supported ECC memory, had AES-NI and I was planning on using the server as a media server, I chose to go for the higher end CPU choice of the Xeon E3-1231 v3. The higher end processor seemed necessary as it was going to be doing some transcoding and I didn’t want the server falling to its knees every time someone tried to watch a video. The difference in power consumption between using this compared to a pentium is fairly negligible so it didn’t seem worth it just to save a tiny bit of power.
Memory Link to heading
Samsung DDR3 1.35v-1600 M391B1G73QH0 RAM Link to heading
I ended up maxing out the amount of memory at 32GB that I can put on my motherboard as it only allows 8GB DIMMs. I figured it was worth giving FreeNAS as much memory as it could work with, as ZFS is optimized to make good use of it. Too little memory on FreeNAS and you’re likely to start seeing problems.
This was actually the part I had the hardest time finding. Using memory that is not on your motherboard’s recommended parts list can lead to some issues, especially with ZFS and FreeNAS, so I had to track down a specific type of memory. There are even horror stories on the FreeNAS forums about problems created by using incorrect memory.
Boot Drive Link to heading
2x 32GB SATA III SMC DOM Link to heading
The way FreeNAS runs is quite different than most other systems. While normally your operating system is running right off the drive, FreeNAS puts the entire operating system into memory upon startup. For the longest time people have been using USB flash-drives as a boot drive because, although slower, it shouldn’t matter what the speed of the drive is once the system has booted up. USB flash-drives have also been popular because not much space is needed for the OS, as anything that’s installed as a plugin goes right on your hard drive in FreeNAS. The only thing that is written to the disc is the operating system, for security reasons.
On the FreeNAS forums there’s recently been a bit of a shift to using SSDs or SATA DOMs for reliability. I ended up going with a SATA DOM as they’re nice and small, they can be plugged directly into a SATA port, and they have a fairly low power consumption. I could have also just used a small SSD.
I wanted to have a bit of extra redundancy so that in case the boot drive got corrupted I could easily restore functionality to the server without losing my FreeNAS configuration. While it’s probably a little overkill, I decided to run 2 mirrored SATA DOMs as my boot drive. In case one fails, I should be able to just reboot and run straight off the other one. I can then pick up another SATA DOM, plug it in and the mirror will resilver. In order to run two SATA DOMs on the X10SL7-F, I purchased a four pin to two pin CBL-CDAT-0597 y-connector from Supermicro.
Hard Drives Link to heading
6x 6TB Western Digital Reds Link to heading
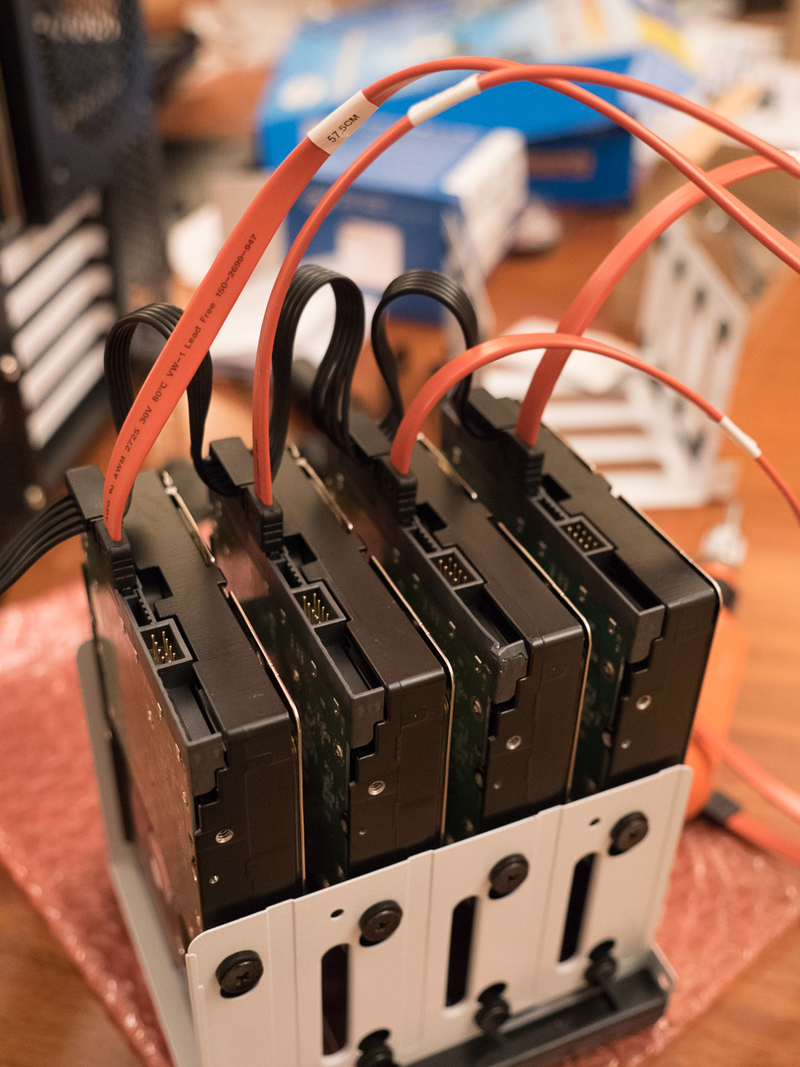 The Western Digital reds are kind of the go-to for most high end home servers and are highly recommended on the FreeNAS forums. I went with the 6TB drives as they seem to be at a pretty good price per gigabyte.
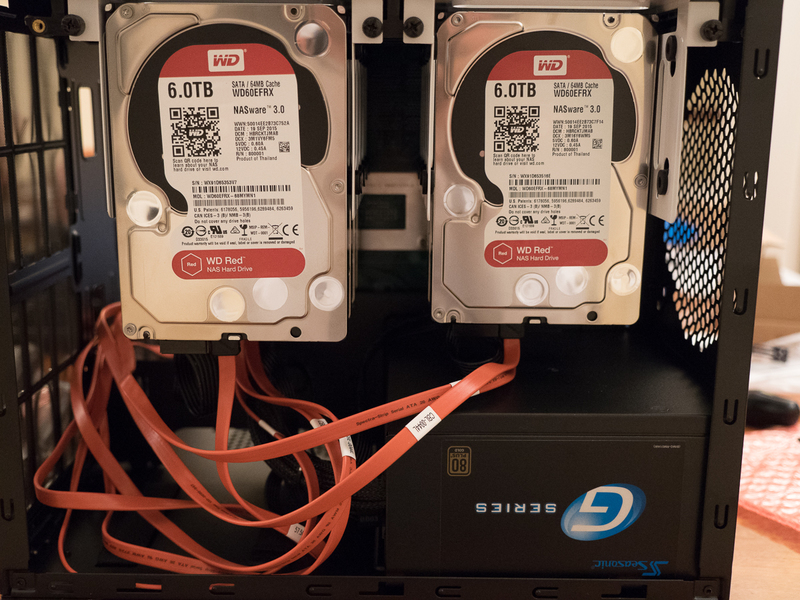
The 6 hard drives fit nicely in the case and I could easily fit another three drives in the bay. I also still have room for 2 SSDs in case I ever decide I want to put in a cache, log, or L2ARC, which I decided would not be beneficial at this point.
Case Fans Link to heading
ENERMAX T.B. Silence UCTB12P and Noctua NF-P14s redux-1200 Link to heading
Unfortunately, while the case does come with three fairly quiet fans, they have no PWM and therefore need to be stuck on a constant setting. I had planned to put the server right in my workspace and wanted it to be fairly quiet. I also wanted to be sure it was getting adequate cooling and therefore leaving it at a constant setting kind of worried me. I ended up deciding to get PWM fans that will ramp up and down based on the temperature of the CPU. The motherboard has the ability to run five fans using PWM, one of which is reserved for the CPU. With these fans, the server is extremely quiet, even when it gets up to a high workload. I would say it’s much quieter than an average desktop PC
Pre setup Link to heading
Before installing any software onto the server, the LSI controller needed to be cross flashed into IT mode so that instead of acting as a RAID controller, it runs as a dumb HBA and passes all information through to ZFS. Due to how ZFS works, it wants to have complete control of the hard disks. If a RAID controller is used, complete information about the state of the disks is not passed through to ZFS which can cause problems along the way and potentially hide information about failing disks.
Supermicro makes the firmware available with an ISO that can be mounted over IPMI or burned to a USB disk. I chose to mount the ISO, and reboot boot into the UEFI shell where the provided program can be run.
fs0:
cd UEFI
SMC2308T.NSH
After following simple directions my controller was successfully flashed to IT mode.
FreeNAS Setup Link to heading
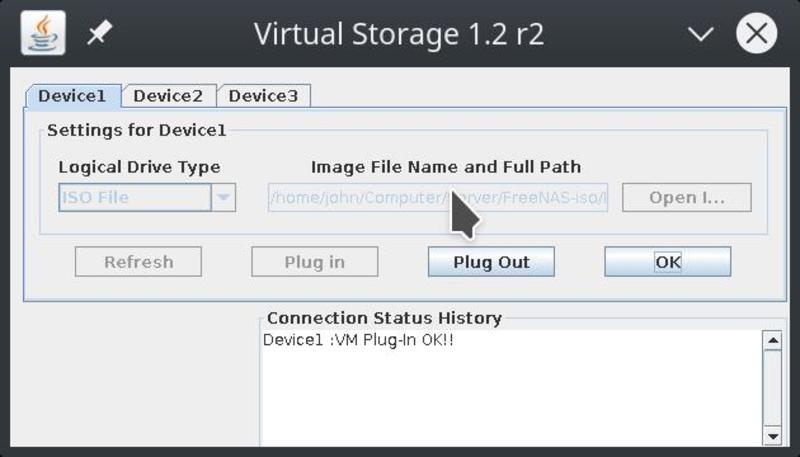
Setting up FreeNAS was incredibly easy. I downloaded the image, and because of IPMI was able to mount the image over the network as if it was a regular drive.
After booting from the image, I saw the following screen with the IP of my FreeNAS box and a few setup options. I didn’t need to change anything at this screen, and you can change all of these options later from the web interface.
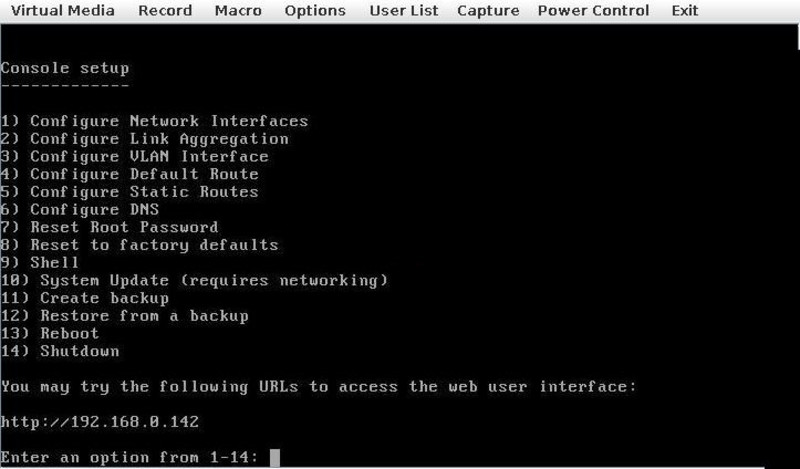
After punching in my IP in my browser, I was greeted by FreeNAS’s welcome screen and the setup wizard. Before going through with the setup and initializing my discs, I ran a proper burn-in.
Burn in Link to heading
Memory Link to heading
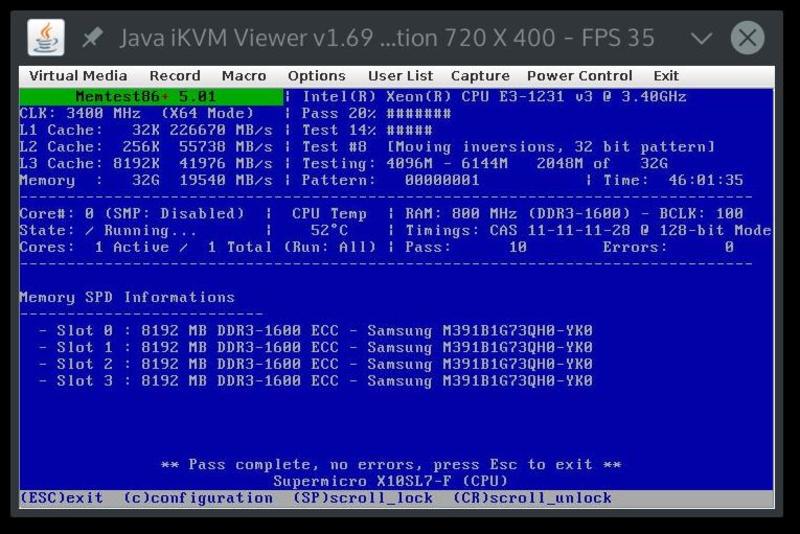
As memory is so key to ZFS it was the first thing I checked. I downloaded a utility called memtest86+ and let it run for 46 hours.
Hard Drives Link to heading
Most hard drives die in the first hours of usage, so this makes it all the more critical to run the proper tests before setting up your entire system so that you don’t do all that work and end up finding out later that one or more of your hard drives need to be sent back to the manufacturer. I followed the process detailed on the FreeNAS forums, which explains how to run a proper burn in on your disks in order to weed out bad hardware.
The process I went through involved:
Smartctl tests
Short test:
smartctl -t short /dev/adaXConveyance test:
smartctl -t conveyance /dev/adaXLong test:
smartctl -t long /dev/adaX
Badblocks test:
Enable the kernel geometry debug flags
sysctl kern.geom.debugflags=0x10Run badblocks on each drive (4096 block due to 6TB size):
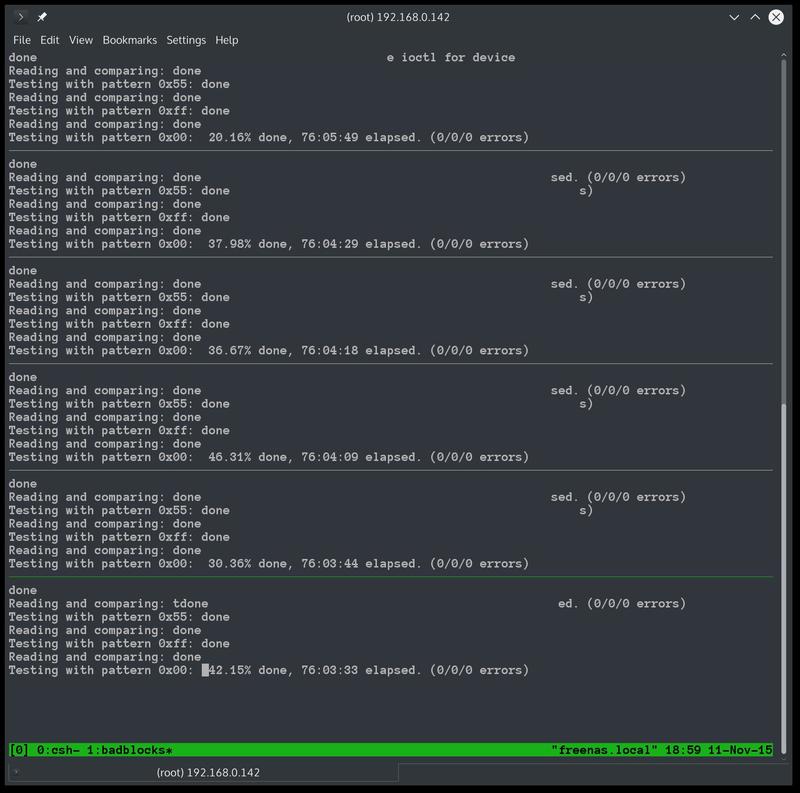
badblocks -b 4096 -ws /dev/adaX
The badblocks test took me almost four days due to the large hard drives.
Rerun smartctl long test:
- Long test:
smartctl -t long /dev/adaXView results:
[root@freenas] ~# smartctl -A /dev/da0
smartctl 6.3 2014-07-26 r3976 [FreeBSD 9.3-RELEASE-p28 amd64] (local build)
Copyright (C) 2002-14, Bruce Allen, Christian Franke, www.smartmontools.org


=== START OF READ SMART DATA SECTION ===
SMART Attributes Data Structure revision number: 16
Vendor Specific SMART Attributes with Thresholds:
ID# ATTRIBUTE_NAME          FLAG     VALUE WORST THRESH TYPE      UPDATED  WHEN_FAILED RAW_VALUE
  1 Raw_Read_Error_Rate     0x002f   200   200   051    Pre-fail  Always       -       0
  3 Spin_Up_Time            0x0027   198   198   021    Pre-fail  Always       -       9091
  4 Start_Stop_Count        0x0032   100   100   000    Old_age   Always       -       22
  5 Reallocated_Sector_Ct   0x0033   200   200   140    Pre-fail  Always       -       0
  7 Seek_Error_Rate         0x002e   200   200   000    Old_age   Always       -       0
  9 Power_On_Hours          0x0032   100   100   000    Old_age   Always       -       166
10 Spin_Retry_Count        0x0032   100   253   000    Old_age   Always       -       0
11 Calibration_Retry_Count 0x0032   100   253   000    Old_age   Always       -       0
12 Power_Cycle_Count       0x0032   100   100   000    Old_age   Always       -       22
192 Power-Off_Retract_Count 0x0032   200   200   000    Old_age   Always       -       20
193 Load_Cycle_Count        0x0032   200   200   000    Old_age   Always       -       20
194 Temperature_Celsius     0x0022   125   118   000    Old_age   Always       -       27
196 Reallocated_Event_Count 0x0032   200   200   000    Old_age   Always       -       0
197 Current_Pending_Sector  0x0032   200   200   000    Old_age   Always       -       0
198 Offline_Uncorrectable   0x0030   100   253   000    Old_age   Offline      -       0
199 UDMA_CRC_Error_Count    0x0032   200   200   000    Old_age   Always       -       0
200 Multi_Zone_Error_Rate   0x0008   200   200   000    Old_age   Offline      -       0
Luckily all my results came up clean.
Drive Configuration Link to heading
I had considered a few different configurations but ultimately I decided it would be nice to have at least 2 parity drives so I decided RAIDZ2 would be best. I know it is common for a second drive to fail right after the first, as that’s when the drives have to start doing a lot of work to recover the pool, so I wanted to have at least a second drive that had to fail before the entire thing went down. The built-in setup wizard made this very easy and actually told me that RAIDZ2 format would be the optimal setup.
Fan Configuration Link to heading
The way fans are configured is fairly unintuitive, especially if you want to configure something that is not usually used in servers, like slower, quieter fans. Initially when I hooked up my PWM fans they were cycling between off and full speed making a lot of noise. Obviously this is not what I expected. It turns out the lower threshold value of the fans was set way too high for a low speed, quiet fan like the type I was trying to put in. In order to fix this I had to go into the IPMI tools where you can set the sensor thresholds.
My suggested fan thresholds from the manufacturer.
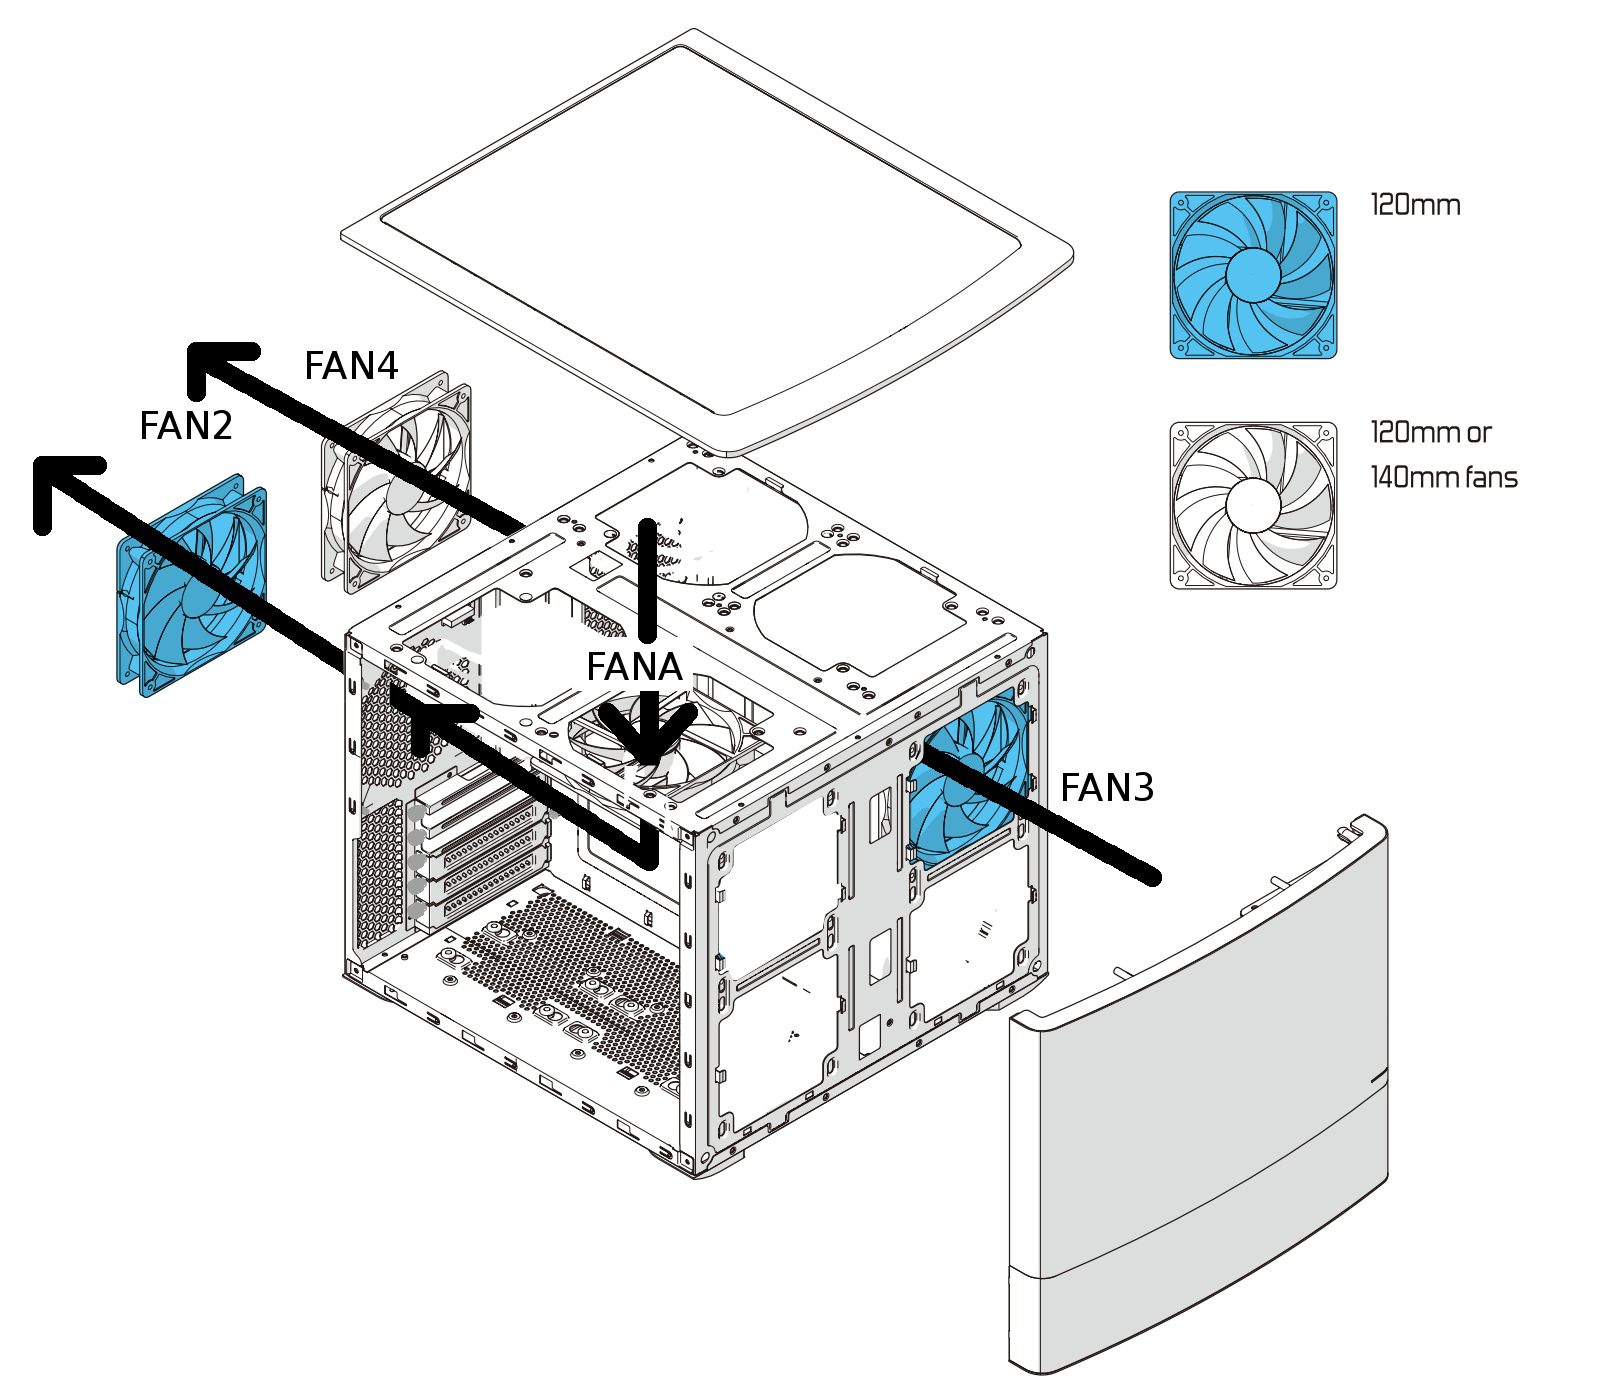
FAN1: CPU
FAN2: 120mm |
FAN3: 120mm | SIDE
FAN4: 140mm |
FANA: 140mm | TOP

-------------------------------------
140mm: Noctua NF-P14s redux-1200
[FAN4, FANA]

Max Speed: 1200 RPM (+-10%)
Min Speed: 400 RPM (+-20%)

Lower Non-Recoverable   : 175
Lower Critical          : 250
Lower Non-Critical      : 320

Upper Non-Critical      : 1200
Upper Critical          : 1320
Upper Non-Recoverable   : 1420

-------------------------------------
120mm:  ENERMAX T.B. Silence UCTB12P
[FAN2, FAN3]

Max Speed: 1500 (+/- 10%) RPM
Min Speed: 500 (+/- 10%) RPM

Lower Non-Recoverable   : 275
Lower Critical          : 350
Lower Non-Critical      : 450

Upper Non-Critical      : 1650
Upper Critical          : 1725
Upper Non-Recoverable   : 1800
This is the fan configuration I ended up going with. I liked this configuration because it allowed me to use the larger fans where I could, allowing for more airflow with a slower rate.
To access the fan settings I used ipmitool. To view your Sensors currently hooked up to IPMI use the ipmitool sensor list all command.
Here are my current sensor values that solved the cycling problem:
[root@freenas] ~# ipmitool sensor list all
CPU Temp         | 32.000     | degrees C  | ok    | 0.000     | 0.000     | 0.000     | 95.000    | 100.000   | 100.000
System Temp      | 38.000     | degrees C  | ok    | -9.000    | -7.000    | -5.000    | 80.000    | 85.000    | 90.000
Peripheral Temp  | 39.000     | degrees C  | ok    | -9.000    | -7.000    | -5.000    | 80.000    | 85.000    | 90.000
PCH Temp         | 45.000     | degrees C  | ok    | -11.000   | -8.000    | -5.000    | 90.000    | 95.000    | 100.000
VRM Temp         | 34.000     | degrees C  | ok    | -9.000    | -7.000    | -5.000    | 95.000    | 100.000   | 105.000
DIMMA1 Temp      | 28.000     | degrees C  | ok    | 1.000     | 2.000     | 4.000     | 80.000    | 85.000    | 90.000
DIMMA2 Temp      | 28.000     | degrees C  | ok    | 1.000     | 2.000     | 4.000     | 80.000    | 85.000    | 90.000
DIMMB1 Temp      | 27.000     | degrees C  | ok    | 1.000     | 2.000     | 4.000     | 80.000    | 85.000    | 90.000
DIMMB2 Temp      | 26.000     | degrees C  | ok    | 1.000     | 2.000     | 4.000     | 80.000    | 85.000    | 90.000
FAN1             | 1300.000   | RPM        | ok    | 300.000   | 500.000   | 700.000   | 25300.000 | 25400.000 | 25500.000
FAN2             | 1000.000   | RPM        | ok    | 0.000     | 100.000   | 200.000   | 1600.000  | 1700.000  | 1800.000
FAN3             | 900.000    | RPM        | ok    | 0.000     | 100.000   | 200.000   | 1600.000  | 1700.000  | 1800.000
FAN4             | 700.000    | RPM        | ok    | 0.000     | 100.000   | 200.000   | 1300.000  | 1400.000  | 1500.000
FANA             | 700.000    | RPM        | ok    | 0.000     | 100.000   | 200.000   | 1300.000  | 1400.000  | 1500.000
Vcpu             | 1.818      | Volts      | ok    | 1.242     | 1.260     | 1.395     | 1.899     | 2.088     | 2.106
VDIMM            | 1.320      | Volts      | ok    | 1.096     | 1.124     | 1.201     | 1.642     | 1.719     | 1.747
12V              | 12.102     | Volts      | ok    | 10.164    | 10.521    | 10.776    | 12.918    | 13.224    | 13.224
5VCC             | 5.031      | Volts      | ok    | 4.225     | 4.380     | 4.473     | 5.372     | 5.527     | 5.589
3.3VCC           | 3.344      | Volts      | ok    | 2.804     | 2.894     | 2.969     | 3.554     | 3.659     | 3.689
VBAT             | 3.060      | Volts      | ok    | 2.400     | 2.490     | 2.595     | 3.495     | 3.600     | 3.690
AVCC             | 3.329      | Volts      | ok    | 2.399     | 2.489     | 2.594     | 3.494     | 3.599     | 3.689
VSB              | 3.269      | Volts      | ok    | 2.399     | 2.489     | 2.594     | 3.494     | 3.599     | 3.689
Chassis Intru    | 0x0        | discrete   | 0x0000| na        | na        | na        | na        | na        | na
Fan Adjusting Link to heading
To get rid of the cycling, I adjusted the lower thresholds as low as possible.
To set the bottom three lower thresholds use:
[root@freenas]# ipmitool sensor thresh <sensor> lower <lnr> <lcr> <lnc>
- Set bottom thresholds:
[root@freenas]# ipmitool sensor thresh "FANA" lower 0 100 200
[root@freenas]# ipmitool sensor thresh "FAN4" lower 0 100 200
[root@freenas]# ipmitool sensor thresh "FAN3" lower 0 100 200
[root@freenas]# ipmitool sensor thresh "FAN2" lower 0 100 200
[root@freenas]# ipmitool sensor thresh "FAN1" lower 300 500 700
- Set top thresholds:
[root@freenas]# ipmitool sensor thresh "FANA" upper 1300 1400 1500
[root@freenas]# ipmitool sensor thresh "FAN4" upper 1300 1400 1500
[root@freenas]# ipmitool sensor thresh "FAN3" upper 1600 1700 1800
[root@freenas]# ipmitool sensor thresh "FAN2" upper 1600 1700 1800
Post Setup Link to heading
FreeNAS makes it easy to setup most common server applications with their plugin system. There are common plugins such as media servers like Plex and emby, or data syncing applications like OwnCloud.
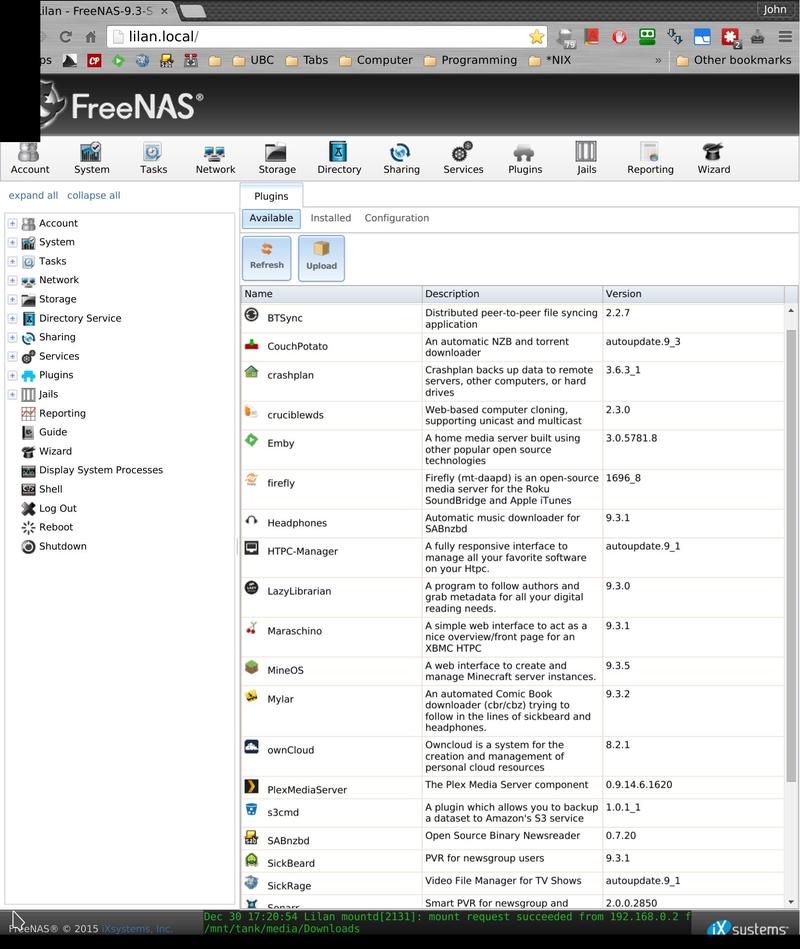
While FreeNAS does not have a huge repository of plugins, when you need something that isn’t provided, you can easily set it up yourself in a jail. There are templates of FreeBSD jails and even VirtualBoxphp jails that can easily be made with the click of a button.
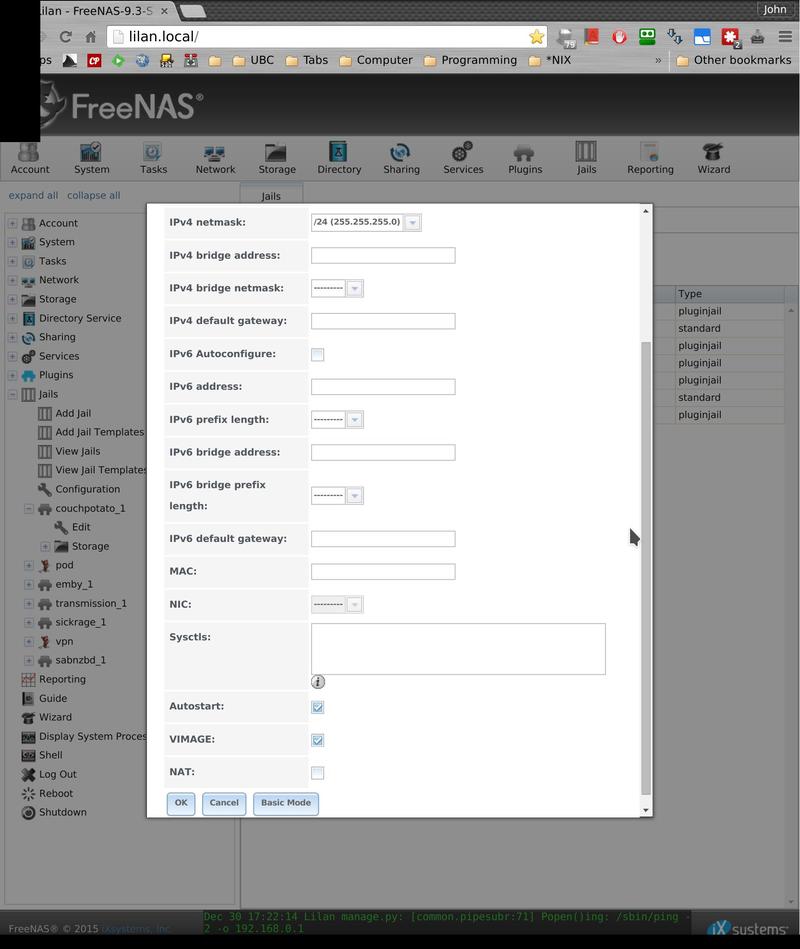
What’s cool about FreeNAS is how everything related to the operation of the server is completely self-encapsulated. Every time you install a plugin or something extra, it is kept by itself in a FreeBSD jail where even if it does go berserk, it has no chance of destroying the rest of your system.
Conclusion Link to heading
In the time I’ve used the server since setting it up I have found it very easy to use. It’s been sitting here beside my desk quietly humming along just loud enough to let me know it’s there. The server ends using about 75 VA once stabilized, and peaks at 130 VA during boot. For such a beast I think that is a fairly good power consumption.

When I did have problems, resorting to the FreeNAS documentation usually allowed me to figure things out myself. The documentation contains examples and instructions for most of the core tasks and has obviously had a lot of thought and time put into it.
FreeNAS has a lot of really cool features and in particular has taken advantage of ZFS. Using a filesystem that lets me take snapshots of my data, and then roll back when I mess something up, has been invaluable. I have used several of the built-in FreeNAS plugins and they have been very easy to install and use. If I do screw something up while changing my plugins or jails it is nice to know that I am able to revert back to when I had my configuration working properly.
When setting things up in FreeBSD jails I have found it to be as easy as installing ports or packages on vanilla FreeBSD if not easier. FreeNAS takes care of making your template jails which you can easily administer from the graphical interface. That is one of the nicest things about FreeNAS: it is extremely powerful if you decide to take advantage of the more advanced features, but it is also reliable and easy to use if you don’t. I’d recommend it to anyone wanting to complete a similar build.